Create a Windows 7 System Repair Disc
And use a System Repair Disc to Repair Windows
In this article we're going to show you how to create a Windows 7 System Repair Disc. The system repair disc can help you repair Windows 7 if a serious error occurs.
There is no doubt that the Microsoft Windows 7 Operating System is very smooth and stable than previous releases, however you never know when your Windows 7 stop booting/working and you might need to repair your Windows 7.
Windows 7 system recovery options can help you fix Windows 7 if a malfunction might occur. To access system recovery options in Windows 7, you will need a Windows 7 setup disc. If you don't have it, you can create a Windows system repair disc to use system recovery options to fix Windows 7.
To Create a Windows 7 System Repair Disc
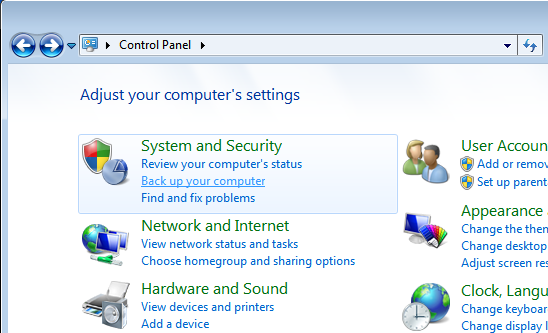
Step 1. Right click on Start button, click Control Panel, click System and Maintenance, and then click Backup and Restore.

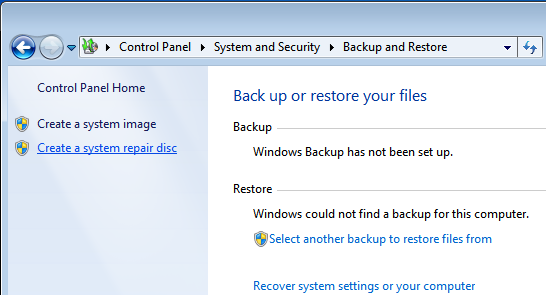
Step 2. In the left pane, click Create a system repair disc (If you're prompted for an administrator password or confirmation, type the administrator password or provide confirmation.)

Note: If you're prompted to inserta Windows 7 installation/setup disc, it means that required files needed to create the Windows 7 system repair disc can not be found on your PC. And, you should insert a Windows 7 instalation disc to continue.
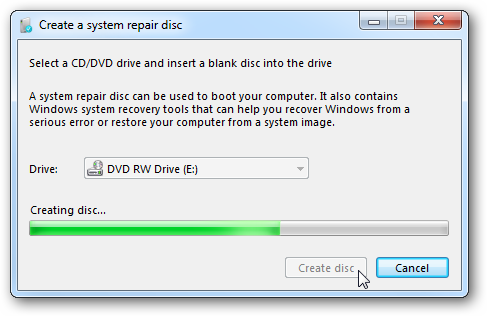
Step 3. The Create a system repair disc dialog box appears, here you select the right drive and click "Create disc" button.

Windows 7 System Repair Disc Related Articles
Learn how to repair Windows 7 Using System Repair Disc...
Do you have any Windows System Repair Disc experiences, ideas, article, story, opinions, errors, problems and tips which you would like to share? Why not take a few moments and Share it with everyone!
Top Windows 7 Articles
How to Upgrade Vista to Windows 7
How to Upgrade XP to Windows 7
How to Install Windows 7 Step-by-Step
How to Install Win7 from USB Flash Drive
Upgrade Starter to Windows 7 Home Premium
How to Auto Logon in Windows 7
How to do Partitioning in Windows 7
How to Create a Restore Point in Win7
How to view File Details in Windows 7
